Showing posts with label PTU CT Tutorial. Show all posts

Saturday, June 4, 2022

"Mommy Cuddles" CT for Scraps N Company


"Mommy Cuddles" CT for Scraps N Company

Kit is "Mommy Cuddles" by Luscious Ladee @ SNCO

This kit has 115 elements, 25 papers and 6 tubes

Tube is included in this kit and is by ©Yuki

It comes in 6 different color combinations and 

you can only use it with this kit.

All available @ Scraps N Company

Font Blessed Day

Mask: Any of your choice

FILTERS USED:  Gradient Glow, and Drop Shadow.

This tutorial was written by me on 6/4/2022, using my own ideas. Any resemblance to others is coincidental and accidental. This tutorial assumes you have a working knowledge of psp and is written in PSP9.

Please leave some love when downloading supplies. The artists/creators work hard to make/share their work with us, so let's be appreciative. Please use all correct copyright/license information and follow all TOU’s. Let’s give credit where credit is due.

As always, tutorials are only a guideline. If you don't have the exact supplies, use ones you have or ones you choose.


Ok let's begin. 

Copy and paste Paper 10 and apply your mask.  Merge group. 

Copy and paste your main tube of choice,  and resize as needed and place where desired.  Add dropshadow to the tube.

Now you can place whatever elements you would like, resize as needed and place where desired.   Dropshadow your elements and main tube.  Here are the elements I used:


3

4

6

10

13

23

24

27

32

33

34

37

40

42

50

51

73

75

79

80

86

87

93

97

103

108


Merge visible and add your copyrights and your name.

I used Blessed Day font for the name.

Merge all visible and save as PNG.

And your done.  Hope you enjoyed using my tutorial.

xoxo

Angie  

"DragonLore" CT for Foxy's Designz


"DragonLore" CT for Foxy's Designz
Tube is "Anna Marine 51-1" by Anna Marine @ CDO
Available for purchase at Creative Design Outlet

Kit is "ScrapFoxy_IB-StanleyMorrison-March2020-AOTM" by Foxy's Designz @ CDO 
Available for purchase at Creative Design Outlet

Font Dragonmaster

Mask: Any of your choice

FILTERS USED:  Gradient Glow, and Drop Shadow.

This tutorial was written by me on 6/4/2022, using my own ideas. Any resemblance to others is coincidental and accidental. This tutorial assumes you have a working knowledge of psp and is written in PSP9.

Please leave some love when downloading supplies. The artists/creators work hard to make/share their work with us, so let's be appreciative. Please use all correct copyright/license information and follow all TOU’s. Let’s give credit where credit is due.

As always, tutorials are only a guideline. If you don't have the exact supplies, use ones you have or ones you choose.


Ok let's begin. 

Copy and paste Paper4_FD and apply your mask.  Merge group. 

Copy and paste your main tube of choice,  and resize as needed and place where desired.  Add dropshadow to the tube.

Now you can place whatever elements you would like, resize as needed and place where desired.   Dropshadow your elements and main tube.  Here are the elements I used:


Element1
Element2
Element3
Element4
Element5
Element6
Element7
Element8
Element9
Element10
Element11
Element12
Element13
Element14
Element15
Element16
Element17
Element18
Element19
Element20


Merge visible and add your copyrights and your name.

I used Dragonmaster font for the name.

Merge all visible and save as PNG.

And your done.  Hope you enjoyed using my tutorial.

xoxo

Angie 

Monday, May 2, 2022

"Fairy Realm" CT for Poisonous Designs


 "Fairy Realm" CT for Poisonous Designs

Tube is by ©Stella Felice Art and comes with 4 different colors and also 4 with wings

Tube is available for purchase at these stores

All That Glitters

Magnolia Gardens Scraps

Kit is "Enchanted Woods" by Jackie's Jewels.  Kit not available anymore but she still has

some amazing kits here at Mystical Scraps

Font: Wizzta


Mask: Any of your choice


FILTERS USED:  Gradient Glow, and Drop Shadow.


This tutorial was written by me on 5/2/2022, using my own ideas. Any resemblance to others is coincidental and accidental. This tutorial assumes you have a working knowledge of psp and is written in PSP9.

Please leave some love when downloading supplies. The artists/creators work hard to make/share their work with us, so let's be appreciative. Please use all correct copyright/license information and follow all TOU’s. Let’s give credit where credit is due.

As always, tutorials are only a guideline. If you don't have the exact supplies, use ones you have or ones you choose.


Ok let's begin. 

Copy and paste Paper 2 and apply your mask.  Merge group. 

Copy and paste your main tube of choice,  and resize as needed and place where desired.  Add dropshadow to the tube.

Now you can place whatever elements you would like, resize as needed and place where desired.   Dropshadow your elements and main tube.  Here are the elements I used:


Bird1

Bird2

Birdcage

Bottle

Bottles

Bunny

Butterfly2

Butterfly3

Clouds

Cottage

Fairy1

Fairy2

Fairy3

Fairy4

FairyDust

Flowers2

Flowers3

Flowers5

Fox

Frog

Hedgehog

Hill

Lamp

Lantern

Log

Mushroom1

Mushroom2

Mushroom3

Rock

Squirrel

Tree2

Unicorn

Windmill

Wolf


Merge visible and add your copyrights and your name.

I used Wizzta font for the name.

Merge all visible and save as PNG.

And your done.  Hope you enjoyed using my tutorial.


xoxo

Angie 

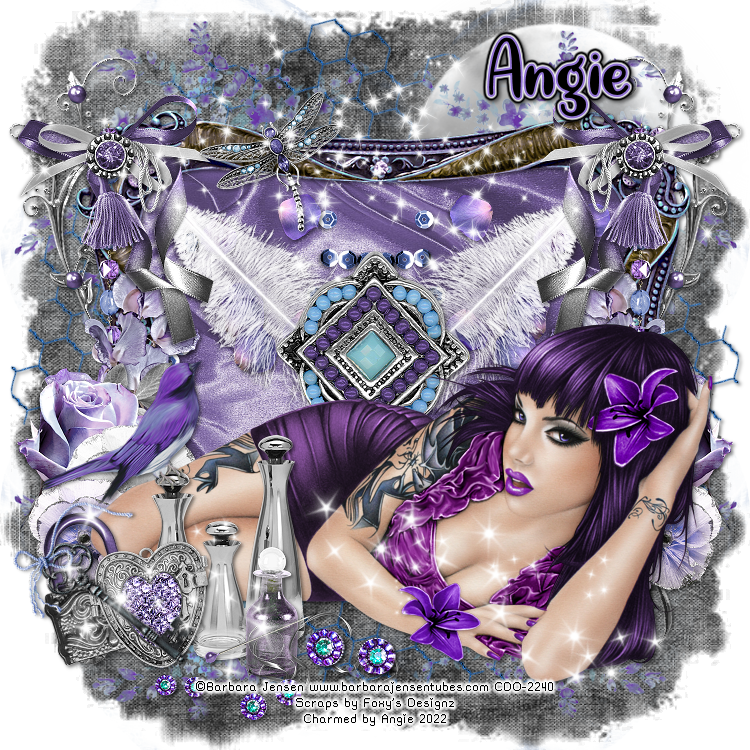
"Dream & Soar" CT for Foxy's Designz

"Dream & Soar" CT for Foxy's Designz

This stunning kit by Foxy's Designz is called "Dream & Soar"

It comes with 44 elements, 5 frames, 12 papers and 2 wordarts

This kit is available for purchase at Creative Design Outlet

Here

Tube is an exclusive by Barbara Jensen-1 available for purchase at Creative Design Outlet

Here

Font: Quite Magical


Mask: Any of your choice


FILTERS USED:  Gradient Glow, and Drop Shadow.


This tutorial was written by me on 5/2/2022, using my own ideas. Any resemblance to others is coincidental and accidental. This tutorial assumes you have a working knowledge of psp and is written in PSP9.


Please leave some love when downloading supplies. The artists/creators work hard to make/share their work with us, so let's be appreciative. Please use all correct copyright/license information and follow all TOU’s. Let’s give credit where credit is due.


As always, tutorials are only a guideline. If you don't have the exact supplies, use ones you have or ones you choose.


Ok let's begin. 


Copy and paste Paper 10 and apply your mask.  Merge group. 

Frame 1

Paste and resize as needed.  Click inside with magic wand, modify, expand by 5.  Paste paper 2 or choice, invert and delete.  Paste Close up tube and invert and delete.  Select none.

Copy and paste your main tube of choice,  and resize as needed and place where desired.  Add dropshadow to the tube.

Now you can place whatever elements you would like, resize as needed and place where desired.   Dropshadow your elements and main tube.  

Here are the elements I used:


2

3

4

5

6

7

8

9

10

11

12

14

15

16

17

26

27

29

31

33

34

36

37

39

41

42

43

44


Merge visible and add your copyrights and your name.

I used Quite Magical font for the name.

Merge all visible and save as PNG.

And your done.  Hope you enjoyed using my tutorial.

xoxo

Angie 
Sunday, May 1, 2022

"Gothic Darkness" CT for Scraps N Company


"Gothic Darkness" CT for Scraps N Company
This kit amazing kit by Chili Designz has all your gothic needs
This kit includes 108 elements, 8 frames, 12 papers and also
includes a poser tube @Maiden Of Darkness that can only be used
in this kit unless purchased.  Not all shown in preview.
Kit is available for purchase at SNCO
I used a Danny Lee tube called "Nun" available for purchase at SNCO

Font: My Dragon Harbor

Mask: Any of your choice

FILTERS USED:  Gradient Glow, and Drop Shadow.

This tutorial was written by me on 5/2/2022, using my own ideas. Any resemblance to others is coincidental and accidental. This tutorial assumes you have a working knowledge of psp and is written in PSP9.

Please leave some love when downloading supplies. The artists/creators work hard to make/share their work with us, so let's be appreciative. Please use all correct copyright/license information and follow all TOU’s. Let’s give credit where credit is due.

As always, tutorials are only a guideline. If you don't have the exact supplies, use ones you have or ones you choose.


Ok let's begin. 

Copy and paste Paper 1 and apply your mask.  Merge group. 

Copy and paste your main tube of choice,  and resize as needed and place where desired.  Add dropshadow to the tube.

Now you can place whatever elements you would like, resize as needed and place where desired.   Dropshadow your elements and main tube.  Here are the elements I used:


arch

berries

berries3

book

books

bottles

bowl

branch

butterfly

candelabre

candelabre2

candle4

dog

flower9

goblet2

greenery5

karafler

oerfume

perfume2

raven

skull2

spider

sparkles

sparkles3

Merge visible and add your copyrights and your name.

I used Dragon Harbor font for the name.

Merge all visible and save as PNG.

And your done.  Hope you enjoyed using my tutorial.

xoxo

Angie


"Moonborn" CT for All That Glitters


"Moonborn" CT for All That Glitters
This gorgeous kit by Moon Vixen Designs comes with all the elements for your gothic needs
This kit includes 149 elements, 11 frames and 26 papers.
Also included are 2 ©Goldwasser tubes that can only be used with
this kit unless purchased. Not all elements shown in preview PU only


This kit is available for purchase at All That Glitters 


Font: My Witcher

Mask: Any of your choice

FILTERS USED:  Gradient Glow, and Drop Shadow.

This tutorial was written by me on 5/2/2022, using my own ideas. Any resemblance to others is coincidental and accidental. This tutorial assumes you have a working knowledge of psp and is written in PSP9.

Please leave some love when downloading supplies. The artists/creators work hard to make/share their work with us, so let's be appreciative. Please use all correct copyright/license information and follow all TOU’s. Let’s give credit where credit is due.

As always, tutorials are only a guideline. If you don't have the exact supplies, use ones you have or ones you choose.


Ok let's begin. 

Copy and paste Paper 12 and apply your mask.  Merge group. 

Copy and paste your main tube of choice,  and resize as needed and place where desired.  Add dropshadow to the tube.

Now you can place whatever elements you would like, resize as needed and place where desired.   Dropshadow your elements and main tube.  Here are the elements I used:


Goldwasser 2 tube
8
10
13
15
16
17
19
20
25
36
40
44
59
60
61
78
79
90
105
119
123
124
132
138
147
148

Merge visible and add your copyrights and your name.

I used My Witcher font for the name.

Merge all visible and save as PNG.

And your done.  Hope you enjoyed using my tutorial.


xoxo

Angie 

"Mystical Unicorn" CT for All Dolled Up


"Mystical Unicorn"  CT for All Dolled Up

This beautiful kit is full of whimsical elements for all your fantasy needs.

This kit includes 145 elements, 8 frames, and 20 papers.

Not all elements shown in preview. This kit also includes a

©Yuki tube.  Tube can only be used with kit unless purchased.

PU only

Kit can be puchased at these stores:

Paper Dolls Scrap Store

Pics for Design

Artistic Designz

Font: Maleficent


Mask: Any of your choice


FILTERS USED:  Gradient Glow, and Drop Shadow.


This tutorial was written by me on 5/1/2022, using my own ideas. Any resemblance to others is coincidental and accidental. This tutorial assumes you have a working knowledge of psp and is written in PSP9.


Please leave some love when downloading supplies. The artists/creators work hard to make/share their work with us, so let's be appreciative. Please use all correct copyright/license information and follow all TOU’s. Let’s give credit where credit is due.

As always, tutorials are only a guideline. If you don't have the exact supplies, use ones you have or ones you choose.


Ok let's begin. 

Copy and paste Paper 5 and apply your mask.  Merge group. 

Copy and paste your main tube of choice,  and resize as needed and place where desired.  Add dropshadow to the tube.

Now you can place whatever elements you would like, resize as needed and place where desired.   Dropshadow your elements and main tube.  Here are the elements I used:


Yuki 1 Tube

2

3

4

5

14

15

18

19

20

24

25

28

29

48

58

61

71

79

82

85

86

87

88

91

92

105

106

107

124

125

126

130

132

133

151

153

Merge visible and add your copyrights and your name.

I used Maleficent font for the name.

Merge all visible and save as PNG.

And your done.  Hope you enjoyed using my tutorial.


xoxo

Angie 

Thursday, April 21, 2022

"Fairy Dust" CT for Twisted Misfit Creations


"Fairy Dust" CT for Twisted Misfit Creations
Tube is called "Fairy Exploration" by Elegance Team and is available for purchase at these stores:
Kit is called "Fairy Dust" by Dnscraps
 Available for purchase at 

Font: Fairy Dust

Mask: Any of your choice

FILTERS USED:  Gradient Glow, and Drop Shadow.

This tutorial was written by me on 4/22/2022, using my own ideas. Any resemblance to others is coincidental and accidental. This tutorial assumes you have a working knowledge of psp and is written in PSP9.

Please leave some love when downloading supplies. The artists/creators work hard to make/share their work with us, so let's be appreciative. Please use all correct copyright/license information and follow all TOU’s. Let’s give credit where credit is due.

As always, tutorials are only a guideline. If you don't have the exact supplies, use ones you have or ones you choose.

Ok let's begin. 

Copy and paste Paper 7 and apply your mask.  Merge group. 

Copy and paste your main tube of choice,  and resize as needed and place where desired.  Add dropshadow to the tube.

Now you can place whatever elements you would like, resize as needed and place where desired.   Dropshadow your elements and main tube.  Here are the elements I used:

bluesparkles
bunny
bunny2
bunny3
butterflys
flowerss2
flowerss3
flowersss
green
greenelves
lawn
magicflowers
magicleaves
magictree
mushroomhouse
mushrooms
mushrooms2
scene
secret
sparkles2
sunflowers
tree2
trunkelves
watterfull3
well

Merge visible and add your copyrights and your name.

I used Fairy Dust font for the name.

Merge all visible and save as PNG.

And your done.  Hope you enjoyed using my tutorial.


xoxo

Angie 


Sunday, April 10, 2022

"Sorceress Charm" CT for All Dolled Up Scraps


"Sorceress Charm" CT for All Dolled Up Scraps
Tube is called "Insoluble Mystery" by VeryMany
Kit is called "Sorceress Charm" by All Dolled Up Scraps
 Available for purchase at these stores:

Font: Dungeon

Mask: Any of your choice

FILTERS USED:  Gradient Glow, and Drop Shadow.

This tutorial was written by me on 4/10/2022, using my own ideas. Any resemblance to others is coincidental and accidental. This tutorial assumes you have a working knowledge of psp and is written in PSP9.

Please leave some love when downloading supplies. The artists/creators work hard to make/share their work with us, so let's be appreciative. Please use all correct copyright/license information and follow all TOU’s. Let’s give credit where credit is due.

As always, tutorials are only a guideline. If you don't have the exact supplies, use ones you have or ones you choose.


Ok let's begin. 

Copy and paste Paper 9 and apply your mask.  Merge group. 

Copy and paste your main tube of choice,  and resize as needed and place where desired.  Add dropshadow to the tube.

Now you can place whatever elements you would like, resize as needed and place where desired.   Dropshadow your elements and main tube.  Here are the elements I used:

1
22
26
27
28
29
30
33
41
43
51
52
55
58
64
65
66
68
70
72
73
80
81
90
92
111
114
115
118
119
135
140
143

Merge visible and add your copyrights and your name.

I used Dungeon font for the name.

Merge all visible and save as PNG.

And your done.  Hope you enjoyed using my tutorial.


xoxo

Angie 


Saturday, April 9, 2022

"Steampunk Style" CT for Magnolia Garden Scraps


"Steampunk Style" CT for Magnolia Garden Scraps
Tube is called "Steampunk72 by VeryMany and is available for purchase

Kit is called "Steampunk Style" by Carolyn Scraps Creations and is available for purchase
at Magnolia Gardens Scraps Store

Font: Steamy

Mask: Any of your choice

FILTERS USED:  Gradient Glow, and Drop Shadow.

This tutorial was written by me on 4/10/2022, using my own ideas. Any resemblance to others is coincidental and accidental. This tutorial assumes you have a working knowledge of psp and is written in PSP9.

Please leave some love when downloading supplies. The artists/creators work hard to make/share their work with us, so let's be appreciative. Please use all correct copyright/license information and follow all TOU’s. Let’s give credit where credit is due.

As always, tutorials are only a guideline. If you don't have the exact supplies, use ones you have or ones you choose.

Ok let's begin. 

Copy and paste Paper 16 and apply your mask.  Merge group. 

Frame 4

Paste and resize as needed.  Click inside with magic wand, modify, expand by 5.  Paste paper 14 or choice, invert and delete.  Paste Close up tube and invert and delete.  Select none.

Copy and paste your main tube of choice,  and resize as needed and place where desired.  Add dropshadow to the tube.

Now you can place whatever elements you would like, resize as needed and place where desired.   Dropshadow your elements and main tube.  

Here are the elements I used:

3
4
10
goggles
hat_1
jewel_1
leaves_3
leaves_4
leaves_5
lamp_post
Jewellery
leaves_2
feathers
flask_1
flower_4
flower_1
flower_6
flower_3
flask_2
mask
flower_11_
ribbon_1
shoe
Balloon
candlestick
cat
cluster_2
cluster_3
clock_1
wings
steampunk_plaque


Merge visible and add your copyrights and your name.

I used Steamy font for the name.

Merge all visible and save as PNG.

And your done.  Hope you enjoyed using my tutorial.

xoxo

Angie

"Dark Elegance" CT for Foxy's Designz


 "Dark Elegance" CT for Foxy's Designz

 Tube is by Enamorte available for purchase @ Creative Design Outlet

Tube

Kit is called "Dark Elegance" by Foxy's Designz

Available for purchase @ Creative Design Outlet

Kit

Font: Copperplate Gothic Light

Mask: Any of your choice

FILTERS USED:  Gradient Glow, and Drop Shadow.

This tutorial was written by me on 4/10/2022, using my own ideas. Any resemblance to others is coincidental and accidental. This tutorial assumes you have a working knowledge of psp and is written in PSP9.

Please leave some love when downloading supplies. The artists/creators work hard to make/share their work with us, so let's be appreciative. Please use all correct copyright/license information and follow all TOU’s. Let’s give credit where credit is due.

As always, tutorials are only a guideline. If you don't have the exact supplies, use ones you have or ones you choose.

Ok let's begin. 

Copy and paste Paper 3 and apply your mask.  Merge group. 

Frame is Element 124

Paste and resize as needed.  Click inside with magic wand, modify, expand by 2.  Paste paper of choice, invert and delete.  Paste Close up tube and invert and delete.  Select none.

Copy and paste your main tube of choice,  and resize as needed and place where desired.  Add dropshadow to the tube.

Now you can place whatever elements you would like, resize as needed and place where desired.   Dropshadow your elements and main tube.  

Here are the elements I used:


1

2

4

5

6

7

12

13

14

15

16

17

18

19

20

21

22

23

24

25

26

28

30

31

32

34

36

38

46

48

49

50

51

52

53

55


Merge visible and add your copyrights and your name.

I used Copperplate Gothic Light font for the name.

Merge all visible and save as PNG.

And your done.  Hope you enjoyed using my tutorial.

xoxo

Angie


Friday, April 8, 2022

"Angel of Sorrow" CT for Scraps N Company


***CT for Scraps N Company***

"Angel of Sorrow" CT for Scraps N Company

Tube included in kit by Yulya_EleganceTeam

Kit by Moon Vixen Designs called "Angel of Sorrow" 

Kit available  Here

Font: Stonehenge

Mask: Any of your choice

FILTERS USED:  Gradient Glow, and Drop Shadow.

This tutorial was written by me on 4/9/2022, using my own ideas. Any resemblance to others is coincidental and accidental. This tutorial assumes you have a working knowledge of psp and is written in PSP9.

Please leave some love when downloading supplies. The artists/creators work hard to make/share their work with us, so let's be appreciative. Please use all correct copyright/license information and follow all TOU’s. Let’s give credit where credit is due.

As always, tutorials are only a guideline. If you don't have the exact supplies, use ones you have or ones you choose.


Ok let's begin. 

Copy and paste Paper 14 and apply your mask.  Merge group. 

Copy and paste your main tube of choice,  and resize as needed and place where desired.  Add dropshadow to the tube.

Now you can place whatever elements you would like, resize as needed and place where desired.   Dropshadow your elements and main tube.  Here are the elements I used:


5

7

12

16

19

26

51

52

57

67

88

101

106

107

108

120

126

142

143

144

152

160


 Merge visible and add your copyrights and your name.

I used Stonehenge font for the name.

Merge all visible and save as PNG.

And your done.  Hope you enjoyed using my tutorial.


xoxo

Angie 

"Spring Beauty" CT for All That Glitters


***CT for All That Glitters***

The scrap kit I used is called "Spring Beauty" by AngelWingScraps

Tube is by Natalia NZ which is included in the kit.

You can purchase the kit at All That Glitters Store

Available here

Font: Enchanted Land

Mask: Any of your choice

FILTERS USED:  Gradient Glow, and Drop Shadow.

This tutorial was written by me on 4/9/2022, using my own ideas. Any resemblance to others is coincidental and accidental. This tutorial assumes you have a working knowledge of psp and is written in PSP9.


Please leave some love when downloading supplies. The artists/creators work hard to make/share their work with us, so let's be appreciative. Please use all correct copyright/license information and follow all TOU’s. Let’s give credit where credit is due.

As always, tutorials are only a guideline. If you don't have the exact supplies, use ones you have or ones you choose.

Ok let's begin. 

Copy and paste Paper 5 and apply your mask.  Merge group. 

Frame is Element 124

Paste and resize as needed.  Click inside with magic wand, modify, expand by 5.  Paste paper of choice, invert and delete.  Paste Close up tube and invert and delete.  Select none.  I also used 2 flower elements and made a flower frame with MuRa's Meister Copies, Encircle setting on default.  Placed the flower frame behind the main frame and paper and resized as needed.

Copy and paste your main tube of choice,  and resize as needed and place where desired.  Add dropshadow to the tube.

Now you can place whatever elements you would like, resize as needed and place where desired.   Dropshadow your elements and main tube.  

Here are the elements I used:

1

12

16

24

27

39

53

59

64

90

93

94

95

97

102

103

104

112

113

116


Merge visible and add your copyrights and your name.

I used Enchanted Land font for the name.

Merge all visible and save as PNG.

And your done.  Hope you enjoyed using my tutorial.

xoxo

Angie

"Mommy Cuddles" CT for Scraps N Company

"Mommy Cuddles" CT for Scraps N Company Kit is "Mommy Cuddles" by Luscious Ladee @ SNCO This kit has 115 elements, 25 pa...